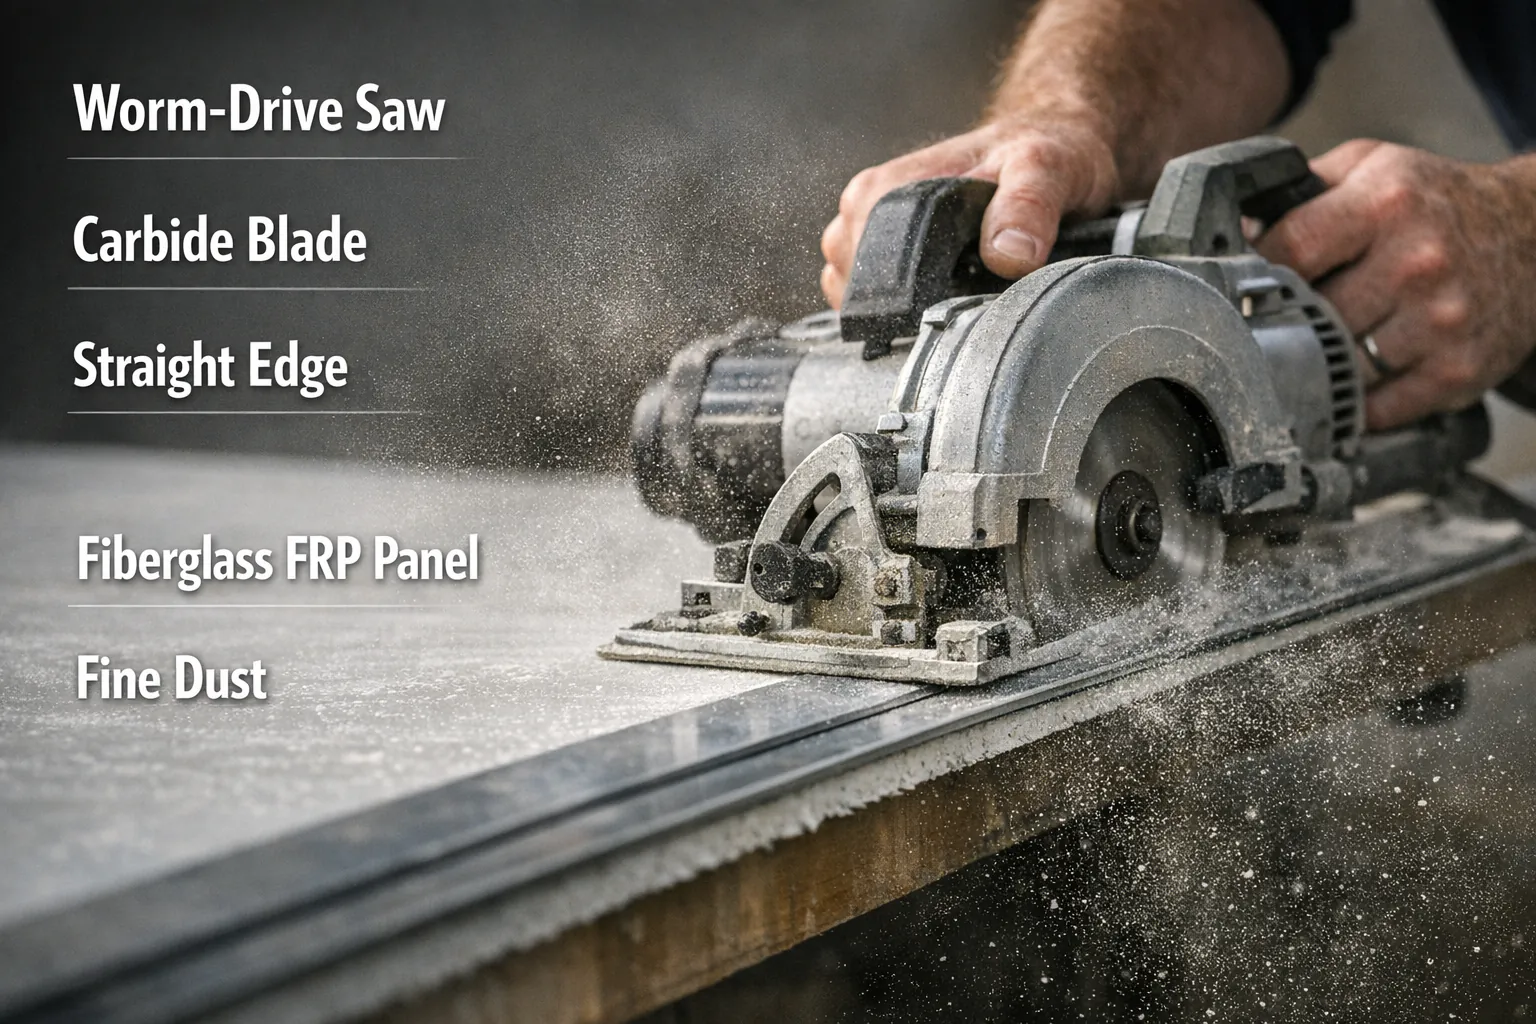
The best way to cut an FRP panel is with a worm-drive circular saw fitted with a carbide-tipped or diamond blade, cutting from the panel’s backside along a clamped straight edge to prevent chipping. Curves and cutouts call for a jigsaw or reciprocating saw with a fine-tooth blade instead.
Cutting is where most FRP installation mistakes start. Get the tool, the technique, and the edge finish right, and the rest of the install goes smoothly.
Key takeaways:
The best way to cut FRP panels is a circular saw with a carbide or diamond blade for straight runs, and a jigsaw for curves and cutouts.
Cut from the panel’s backside and clamp it down. That alone prevents most of the chipping fabricators run into.
Leave a saw-kerf allowance of about 1/8″–3/16″ and plan for roughly 1/8″ of thermal movement per 12 feet of panel.
Always grind and reseal cut edges with resin. Exposed glass fibers wick moisture and degrade faster than a sealed edge.
Keep grating deflection to 3/8″ or less and use at least four corrosion-resistant clips per panel to avoid the two most common structural mistakes.
The Best Way to Cut FRP Panels, Step by Step
Cutting FRP panels cleanly comes down to five things: acclimating the material, securing it, choosing the right blade, cutting from the back, and finishing the edge. Skip one and you’ll see chipping, fraying, or a panel that never quite sits flush.
Let the panel acclimate. FRP expands and contracts with temperature and humidity, so give panels at least 24 hours on site before cutting, stacked on a dry surface rather than directly on concrete.
Mark, measure, and clamp. Mark the cut line against a straight edge and secure the panel with clamps or sawhorses so it can’t shift mid-cut.
Flip the panel and cut from the back. The backside gives you a flatter reference surface and reduces the odds of chipping the finished face you’ll actually see.
Pick the blade for the cut. A worm-gear circular saw with a carbide-tipped, diamond, or gritted masonry blade handles straight runs. Save the jigsaw or reciprocating saw, fitted with a fine-tooth blade, for curves, and drill a starter hole first so the blade has somewhere to enter.
Leave room for kerf and movement. Budget a saw-kerf allowance of roughly 1/8″ to 3/16″, and plan for about 1/8″ of thermal expansion per 12 feet of panel in your layout, per 4TAS Supply.
Trim stray fibers, then grind. Snip loose fibers with electric shears or tin snips, then smooth the cut edge with a coarse resin-fiber grinding disc or open-grit sandpaper, using light, even pressure so you don’t wave the surface.
Reseal the exposed edge. Coat the freshly cut edge with a resin that matches the panel, or a UV-stable urethane spray, before it goes into service. An unsealed edge lets moisture into the fibers and shortens the panel’s life.
Which Tool for Which Cut
Tool | Best for | Blade / bit | Notes |
|---|---|---|---|
Worm-drive circular saw | Long, straight cuts | Carbide-tipped, diamond, or masonry blade | Cut from the back; guide along a clamped straight edge |
Jigsaw / reciprocating saw | Curves, notches, cutouts | Fine-tooth blade | Drill a starter hole; feed slowly to avoid jagged edges |
Angle grinder | Field trims, small adjustments | 1mm metal-cutting disc | Works when a saw isn’t handy |
CNC waterjet or router | High-volume, repeat patterns | Diamond-coated tooling | Best where a shop cuts the same profile often |
Electric or manual shears | Trimming loose fibers, thin sheet | N/A | Fast for cleanup, not for thick structural panel |
Finish the Edge, or the Fibers Degrade
Cutting FRP exposes raw glass fiber at the edge. Left alone, that edge picks up moisture, frays, and weakens well before the rest of the panel wears out.
Grind the cut edge smooth with a coarse resin-fiber disc or open-grit sandpaper, then reseal it with a matching resin or a UV-stable urethane spray. Do this on every field cut, not just the factory edges. It’s a five-minute step that adds years to the panel’s service life.
Get the seal right and a well-fabricated FRP structure typically delivers a 20 to 30-year service life, skip it, and moisture intrusion at the cut edge is usually what cuts that life short.
Don’t Skip the Dust and Safety Precautions
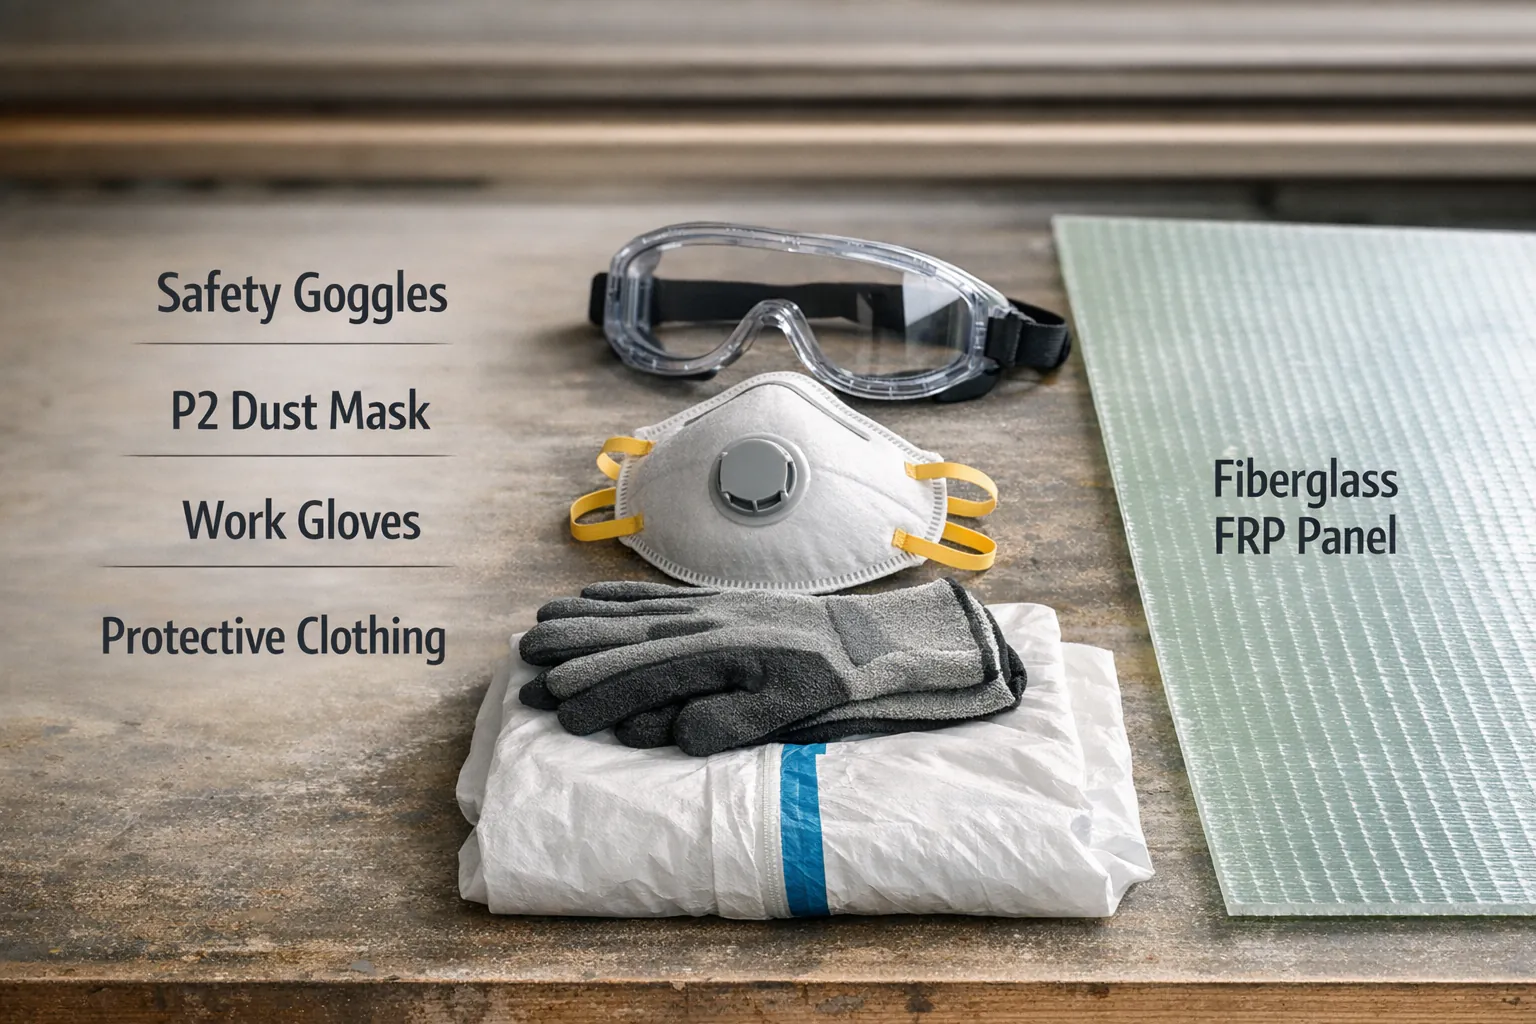
Cutting FRP throws fine glass and resin particles into the air, and those particles irritate eyes, skin, and lungs. At minimum, wear:
Gloves
Approved safety glasses or goggles
A P2 dust mask or respirator
Protective, long-sleeve clothing
Work in a well-ventilated space, ideally outdoors, and run a dust extraction system or shop vacuum on the saw itself. Fine airborne dust is a real jobsite hazard, not just a nuisance.
Dust from fiberglass and resin settles fast once the saw stops, so recheck your dust extraction setup every time you switch tools or start a new panel. A shop vacuum on the saw catches most of the dust at the source, and a swept floor keeps settled dust from being kicked back into the air by foot traffic.
Account for Load and Deflection
FRP grating is built to flex slightly under load, and ignoring that deflection is one of the more expensive installation mistakes. Too much deflection creates a soft, bouncy feel underfoot, or worse, a real safety issue.
Standard FRP walkway guidelines call for keeping deflection to 3/8″ or less, with 1/4″ giving a noticeably firmer feel and 1/2″ as the outer limit. To size a span correctly, know the actual load: a static load behaves differently from a dynamic or impact load, and sustained loads increase deflection over time through creep. Undersizing here shows up as a maintenance problem months, not minutes, after installation.
Use the Right Fasteners
Plan on at least four fasteners per FRP grating panel, positioned at least 1 1/2″ from the panel edge. Clips are typically 316 stainless steel for corrosion resistance, with grades 304 and 306 as common alternatives.
The clip style depends on the connection and whether the grating is molded or pultruded:
M clips attach molded or pultruded grating across two adjacent bearing bars for very secure holding.
G clips attach molded or pultruded grating to a structural member flange, with strong bi-directional holding.
J clips (pultruded) and L clips (molded) suit lighter-duty applications.
Molded vs. Pultruded: Why the Cutting Method Depends on the Product
FRP (fiber-reinforced plastic, also called fiberglass-reinforced plastic) is a composite of resin and fiberglass, and it’s manufactured two main ways. Molded FRP is built by layering resin and fiberglass in a mold until it reaches the target thickness, which gives it strong bi-directional strength. Pultruded FRP is pulled continuously through a die, which lets it span longer distances and carry heavier loads, though its strength runs mainly in one direction.
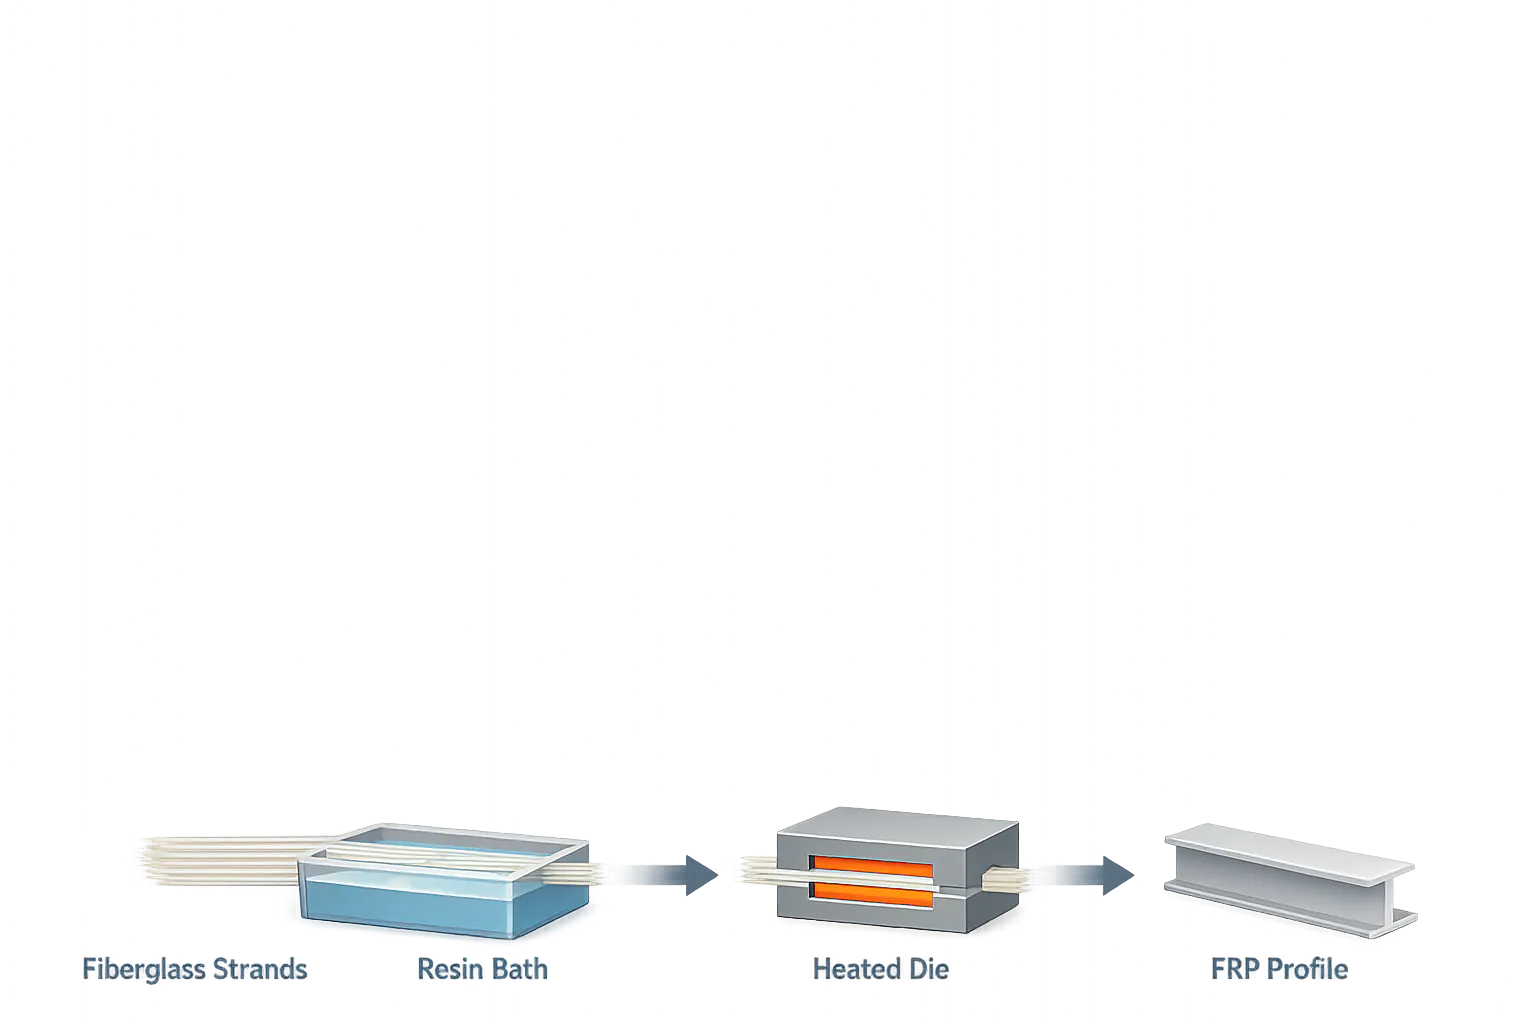
That difference matters at the saw. Pultruded profiles and beams often call for a steadier, single-pass straight cut given their unidirectional fiber layout, while molded panels and grating tolerate the jigsaw and curved cuts described above more easily. Our guide to FRP structural profiles covers pultruded shapes in more depth if you’re specifying beams or channels.
FRP’s weight is a big part of why cutting and handling it is faster than steel: FRP grating weighs roughly 75% less than steel at a comparable load rating. That’s less material to muscle onto sawhorses and less strain on the crew doing the cutting.
Find an FRP Partner Who Gets the Details Right
Cutting, sealing, and fastening FRP correctly is straightforward once you know the steps, but a bad first cut on-site can cost you a panel and a day. Starting with a properly fabricated and installed structural FRP system removes most of that risk before you ever pick up a saw.
DEFI Structural Fiberglass has decades of fabrication experience producing grating, stair assemblies, handrails, and other FRP products as complete custom structures for water treatment, petrochemical, offshore, and industrial projects across the Gulf Coast. Our team can pre-cut and pre-fit panels to your specs, or walk your crew through field cuts so the edges hold up the way they should. See our notes on long-term FRP maintenance for what to check after installation.
Contact us today for a free quote and see how we can meet your needs.
Quick Reference: FRP Cutting Numbers to Remember
Kerf allowance: 1/8″ to 3/16″ per cut
Thermal movement: roughly 1/8″ per 12 feet of panel
Wall-panel expansion gaps: 1/4″ at floor/ceiling, 1/8″ between panels
Grating deflection limit: 3/8″ max, 1/4″ for a firmer feel
Fasteners: at least 4 clips per panel, 1 1/2″ minimum from the edge
Weight vs. steel: roughly 75% lighter for a comparable load rating
Service life: 20 to 30 years when edges are properly sealed
FAQ
What is the best way to cut FRP panels?
Use a worm-drive circular saw with a carbide-tipped or diamond blade for straight cuts, cutting from the panel’s backside along a clamped straight edge. Switch to a jigsaw or reciprocating saw with a fine-tooth blade for curves and cutouts, then grind and reseal every cut edge.
What is the best tool for cutting FRP?
A handheld circular saw is the most common choice for field cuts, since it handles straight runs cleanly on most FRP products with the right carbide or diamond blade. Shops cutting the same pattern repeatedly often move to a CNC waterjet or router instead.
Can you cut FRP with a grinder?
Yes. An angle grinder fitted with a 1mm metal-cutting disc works for field trims and small adjustments when a saw isn’t practical, though it’s a slower, rougher cut than a circular saw.
How do you cut curves in FRP panels?
Drill a starter hole at one end of the curve, then feed a jigsaw or reciprocating saw fitted with a fine-tooth blade slowly along the marked line. Rushing the cut is what causes jagged edges on curves.
Do you need to seal FRP after cutting?
Yes. A raw cut edge exposes glass fibers that absorb moisture and degrade over time. Grind the edge smooth, then coat it with a resin matching the panel or a UV-stable urethane spray before the piece goes into service.
How much does FRP expand and contract after cutting?
Plan for roughly 1/8″ of thermal movement per 12 feet of panel between seasonal temperature extremes. Leave a matching gap in your layout so panels aren’t fighting each other as they move.
What causes FRP edges to chip when cutting?
Chipping usually comes from cutting on the finished face instead of the back, using a dull or wrong-type blade, or forcing the saw instead of letting it feed at a steady pace. Clamping the panel down and cutting from the backside solves most of it